
Connect GA4 & set up event tracking
This guide walks you through linking Google Analytics 4 to FunnelTrack via the Measurement Protocol API so you can forward server-side events into GA4 — with optional hashed user data for enhanced measurement and audience building.
- •Admin (or Editor) access to your GA4 property
- •A web data stream already created in GA4 admin
- •The FunnelTrack pixel and the Google tag deployed on every page of your funnel
- •About 10 minutes
Connecting to GA4
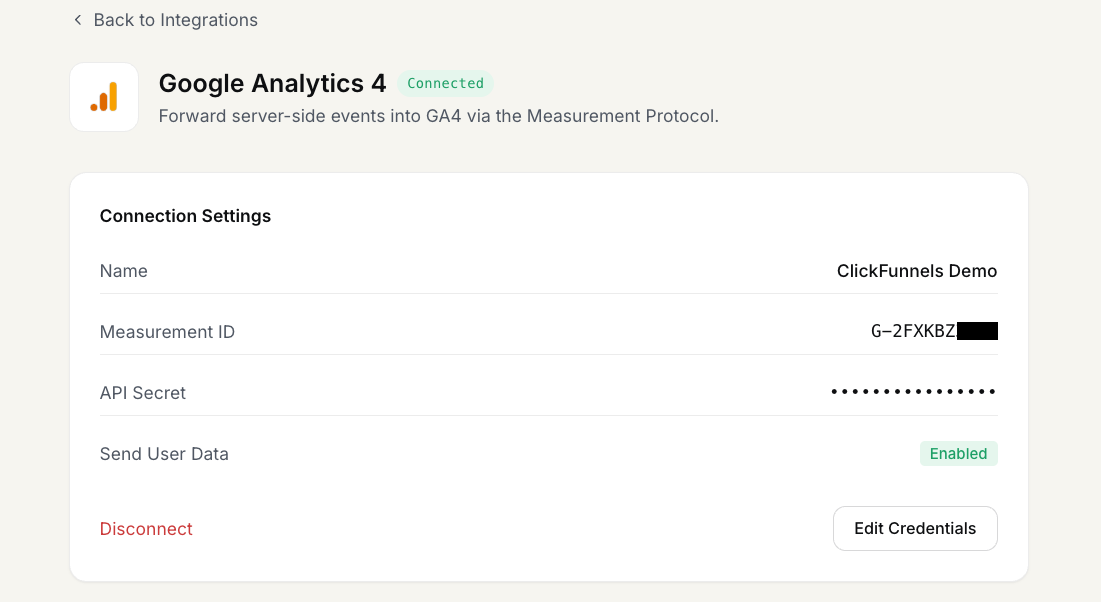
Link FunnelTrack to your GA4 web data stream so we can forward events server-side via the Measurement Protocol.
Find your Measurement ID
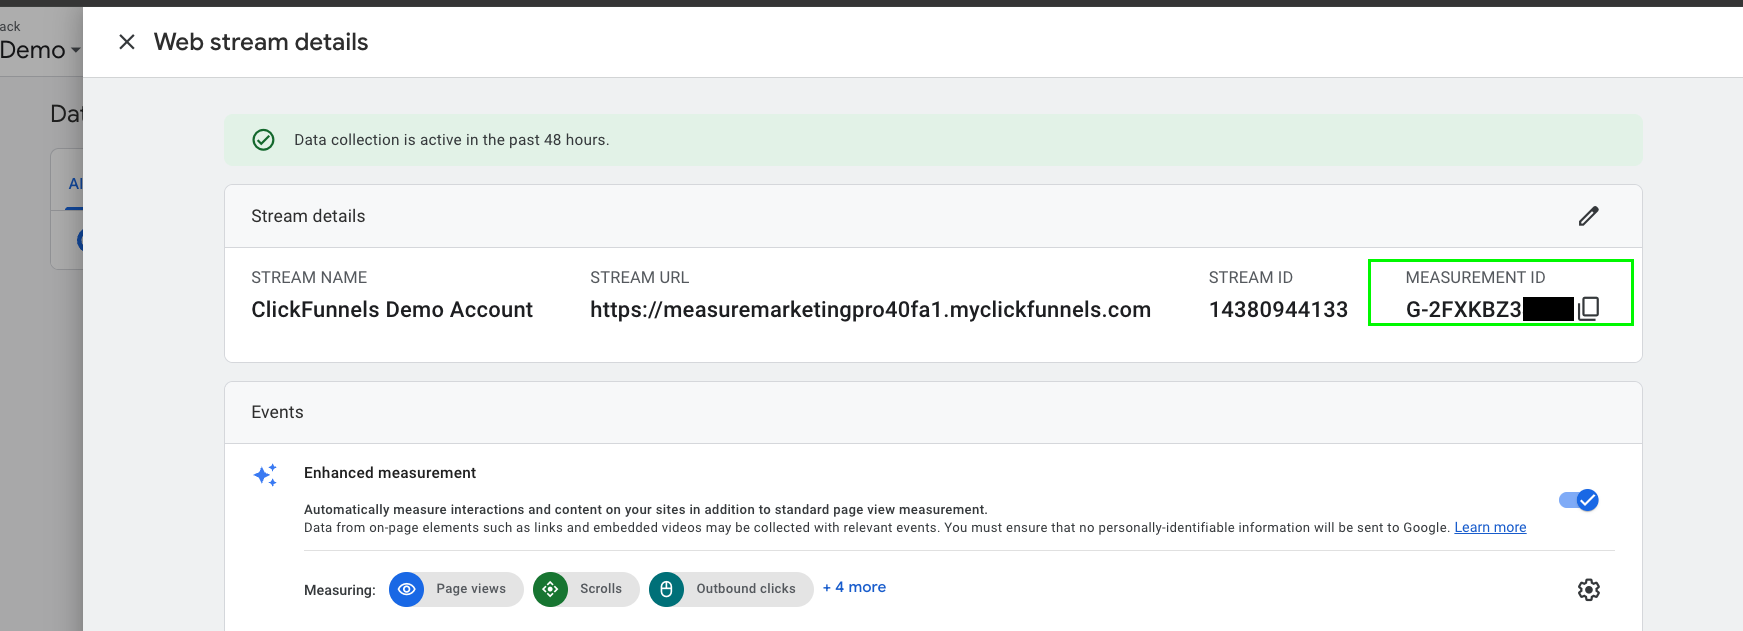
In GA4, go to Admin → Data Streams and open your web stream. The Measurement ID (starts with G-) is in the top-right of the Stream details panel. Copy it and paste it into the Measurement ID field on the Google Analytics 4 integration page in FunnelTrack.
Create a Measurement Protocol API secret
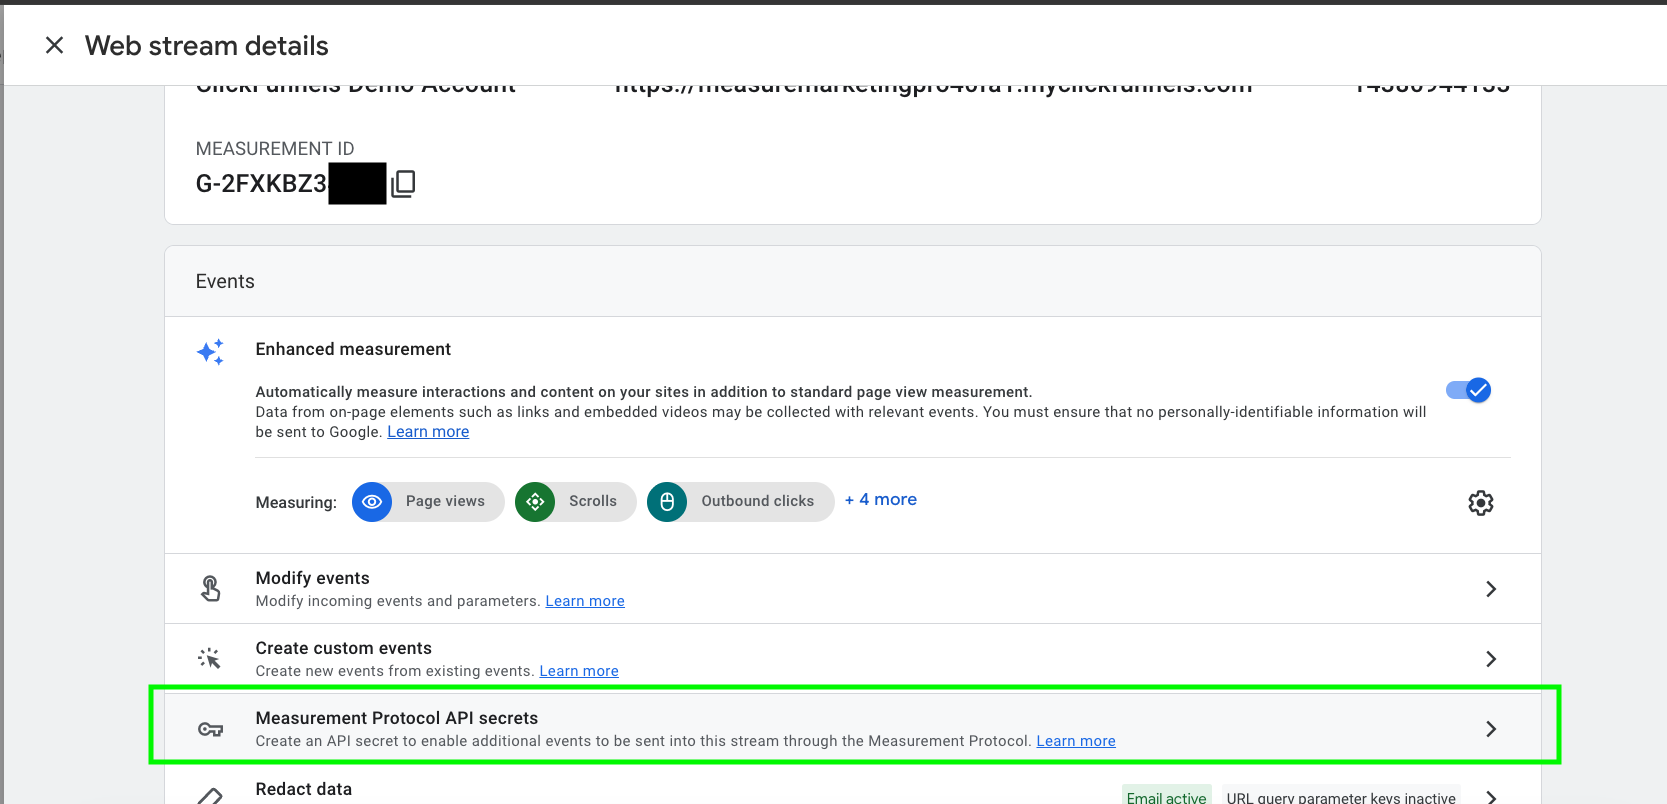
Still in your web stream, scroll down to Measurement Protocol API secrets and click into it. Hit Create, name the secret FunnelTrack, and save.
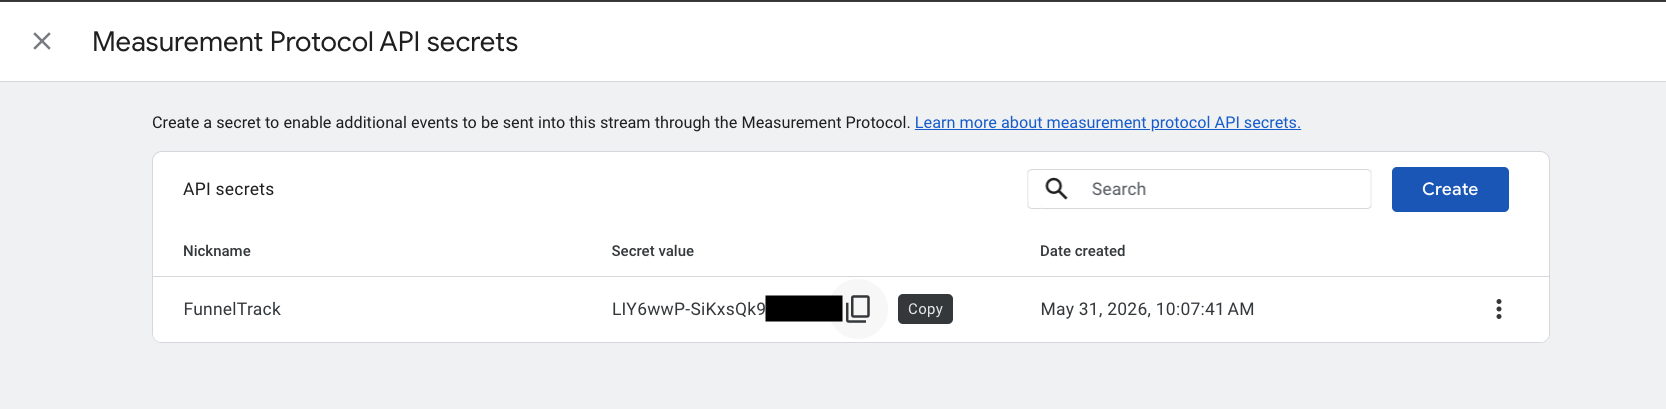
GA4 will show your new secret in the list. Copy the Secret value and paste it into the API Secret field in FunnelTrack.
(Optional) Enable Send User Data
You can opt in to automatic user-data sharing by checking the Send User Data box. When enabled, FunnelTrack sends SHA-256 hashed email, phone, and address data via the Measurement Protocol user_data field — boosting match rates for enhanced measurement and audience building in GA4.

Learn more about Google's data sharing settings here.
Click Connect in FunnelTrack
With Measurement ID and API Secret filled in, click Connect. Your GA4 destination is now wired up — next we'll route events to it.
Setting up event tracking
Route the events FunnelTrack already captures to GA4 as standard or custom GA4 events.
Deploy the FunnelTrack pixel
Make sure the FunnelTrack pixel is deployed on every page of your website and any landing pages. You'll find the script and a verification status in the Pixel section of your FunnelTrack account.
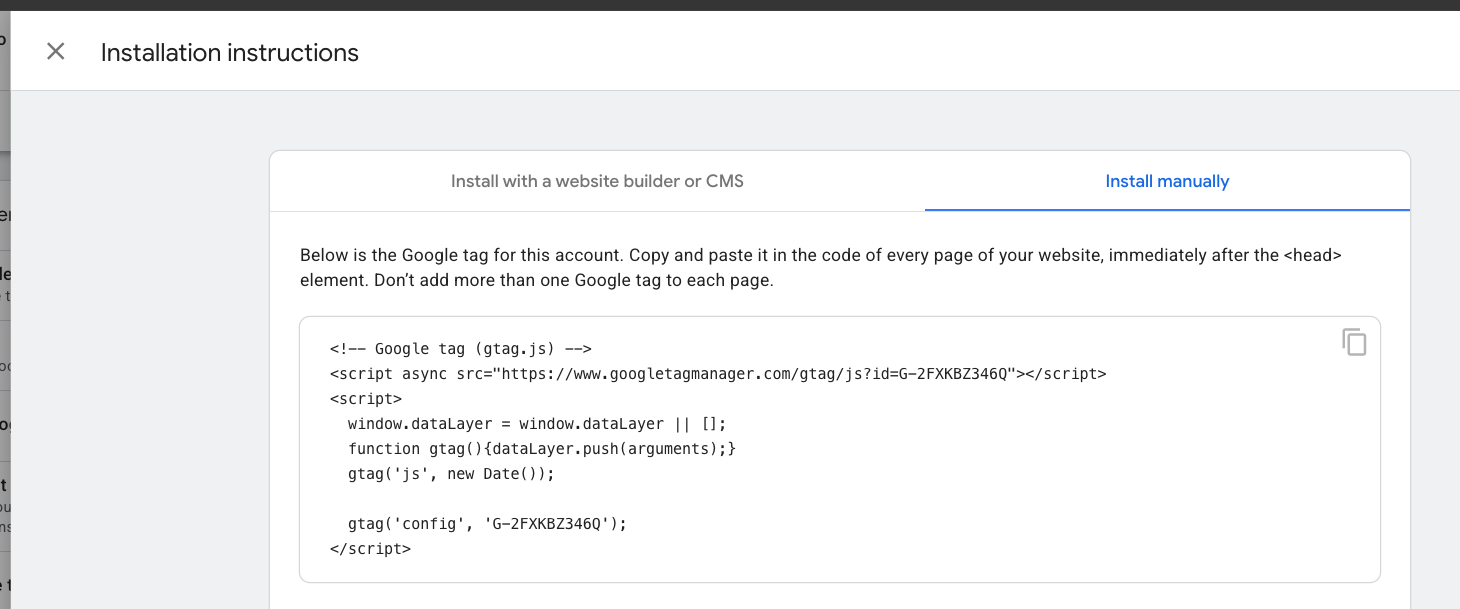
Deploy your Google tag
GA4 also needs its own client-side gtag.json every page of your funnel to capture browser-side activity that pairs with the server-side events FunnelTrack sends. You'll find the install snippet in GA4 under Admin → Data Streams → your stream → View tag instructions → Install manually.
Enable an event template (or create a custom one)
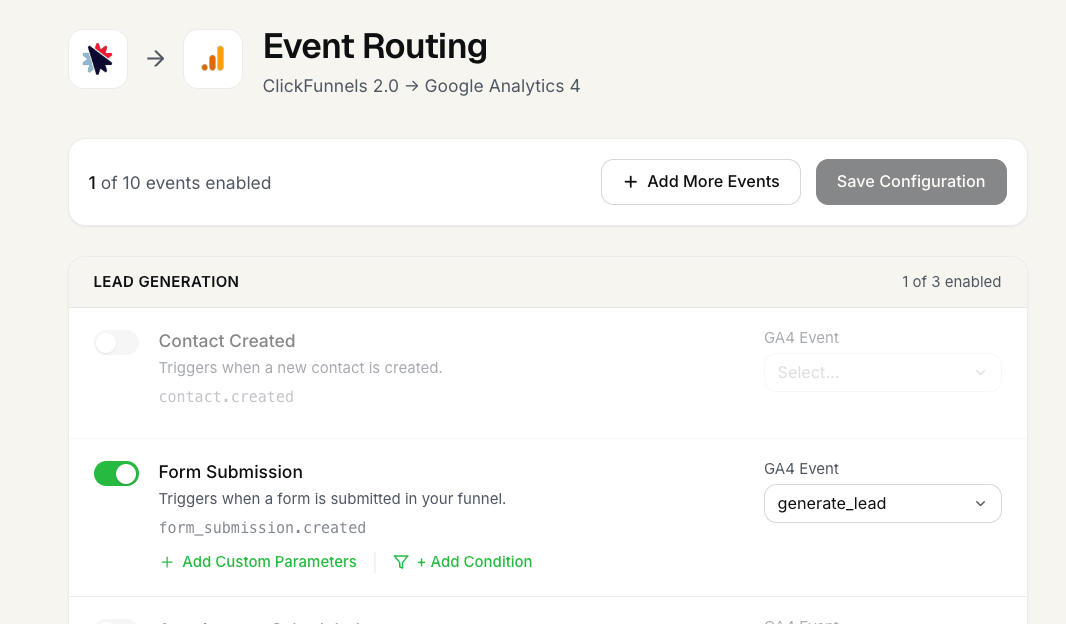
In FunnelTrack, open the source you want to route to GA4 (e.g., ClickFunnels → Google Analytics 4). Toggle on a recommended event template, or click + Add More Events to create a custom one.
Map the event name to a GA4 event
On the right side of each enabled event card, pick a GA4 standard event from the dropdown (generate_lead, purchase, sign_up, etc.) or set a custom event name. This is the name your event will appear under in GA4 reports.
(Optional) Add custom event parameters, user parameters & firing conditions
Attach custom event parameters, user parameters, or gate events behind specific conditions (e.g., only fire purchase when the order value is over $100). Click + Add Custom Parameters or + Add Condition on the event card.
order_value) and user properties (per-user attributes like customer_tier). FunnelTrack supports both — set them explicitly on each event card.Save your changes
Click Save Configuration at the top of the routing page. Your event map is now live — every matching source event will be sent to GA4 from this moment on.
Test & verify
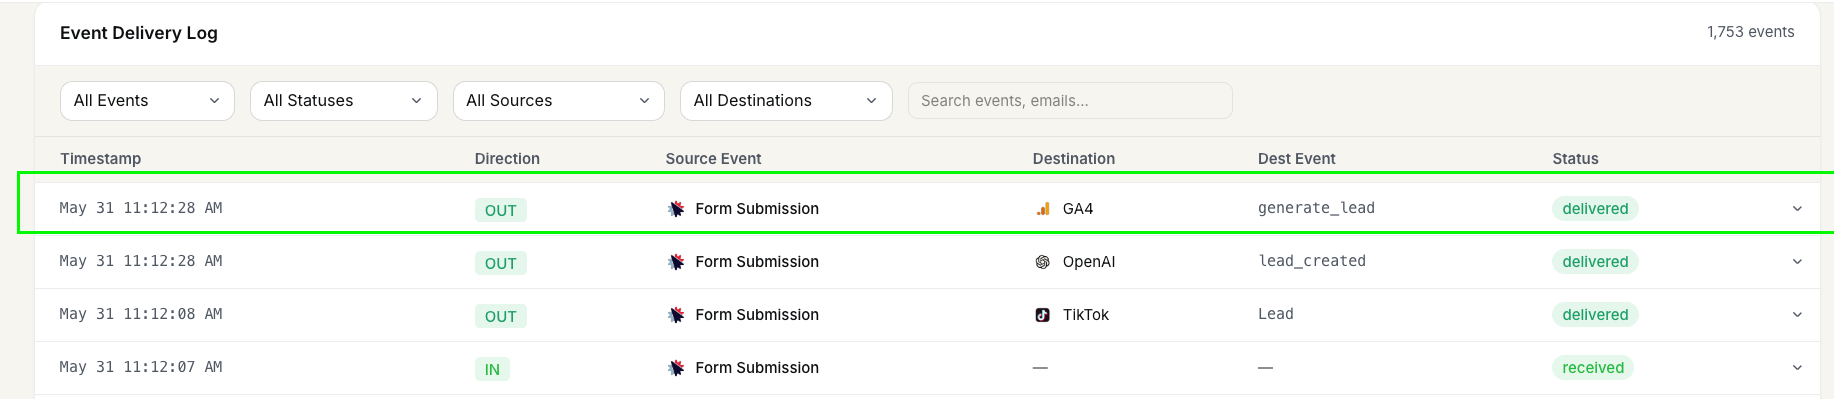
Trigger the action on your website (submit the form, complete the checkout, etc.). Then open Event Delivery Log in FunnelTrack. You should see two rows for each event: an IN row showing FunnelTrack received the source event, and an OUT row showing the dispatch to GA4 marked delivered.
Need a hand?
If anything in this guide didn't match what you're seeing in GA4 or FunnelTrack, open a support ticket in your dashboard and we'll get you sorted.