
Connect Microsoft Ads Conversions API & set up conversion tracking
This guide walks you through linking the Microsoft Advertising Conversions API (currently in open beta) to FunnelTrack via a UET tag and access token — so you can send server-side conversion events alongside your existing client-side UET tracking.
- •Admin access to your Microsoft Advertising account
- •Microsoft CAPI beta access enabled on your account (see callout above)
- •The FunnelTrack pixel and the UET base tag deployed on every page of your funnel
- •About 15 minutes
Connecting to Microsoft Ads
Create a UET tag with the Conversions API setup method, then paste the token and tag ID into FunnelTrack.
Create a UET tag
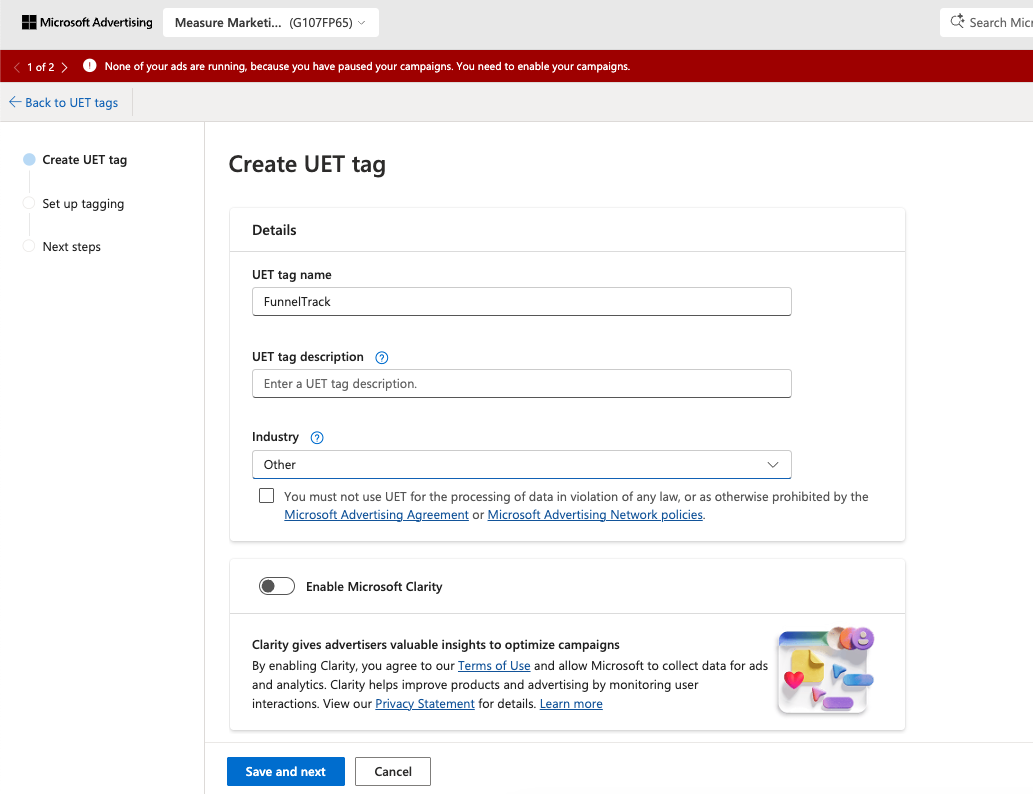
In Microsoft Advertising, go to Tools → UET tags and click + Create. Give your tag a name (e.g. FunnelTrack), pick an industry, and accept the Microsoft Advertising Agreement.
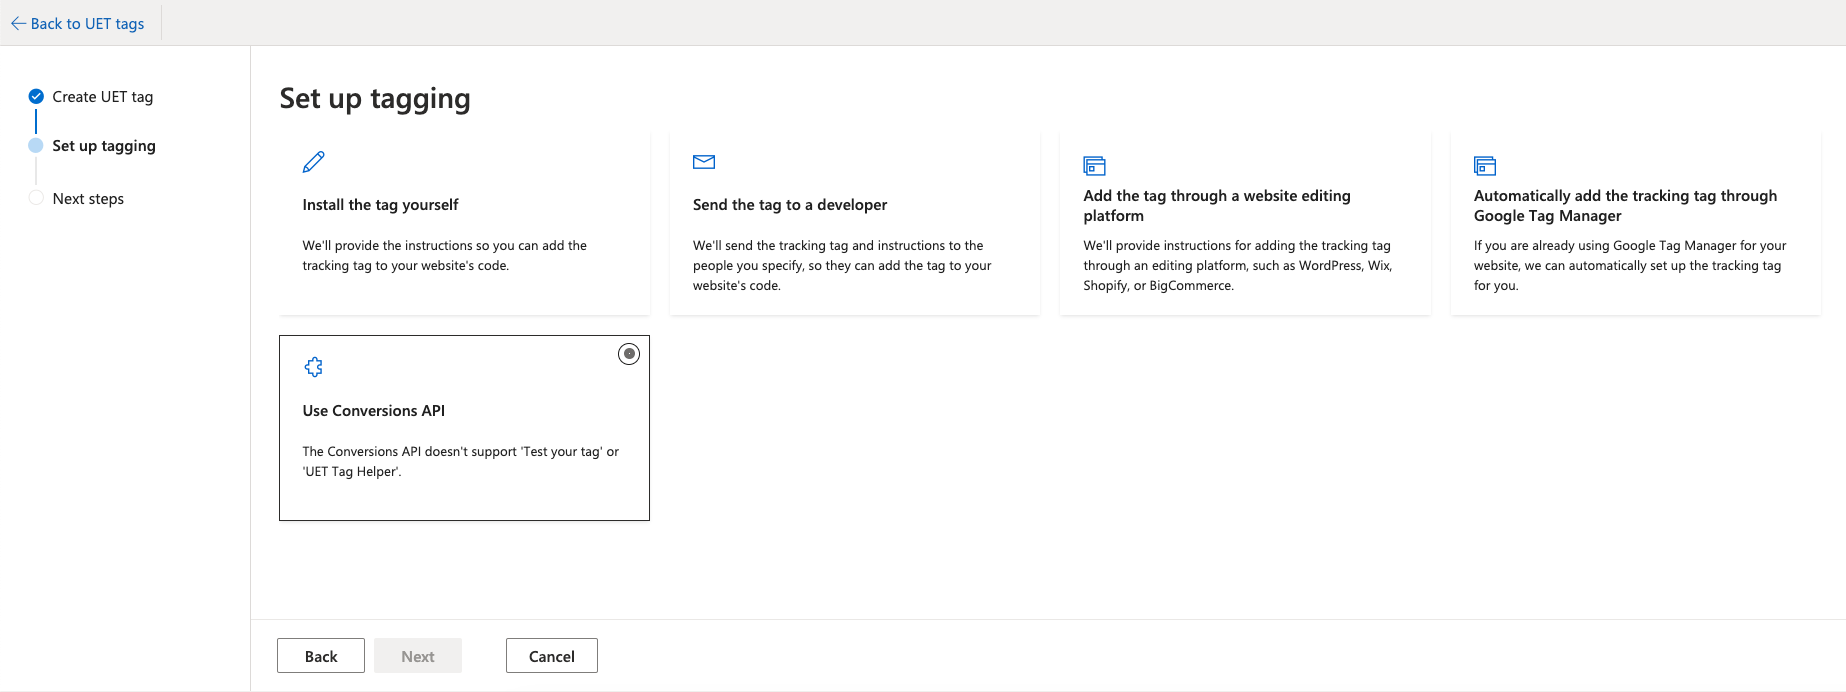
Choose "Use Conversions API" as your setup method
On the Set up tagging step, scroll down past the client-side options (Install yourself / Send to developer / Website builder / GTM) and select Use Conversions API.
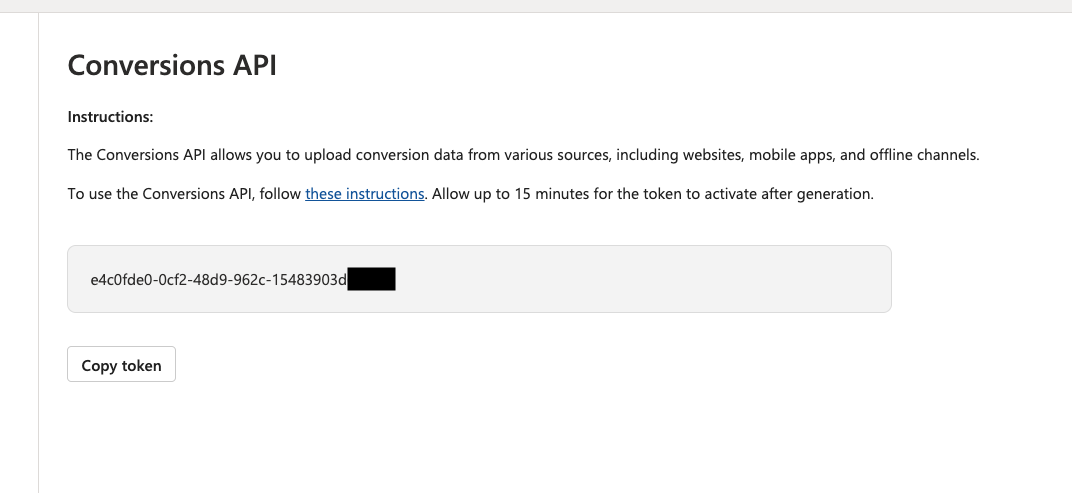
Copy your Conversions API token
After selecting Conversions API, Microsoft displays your access token. Click Copy token and paste it into the Auth Token field in FunnelTrack.
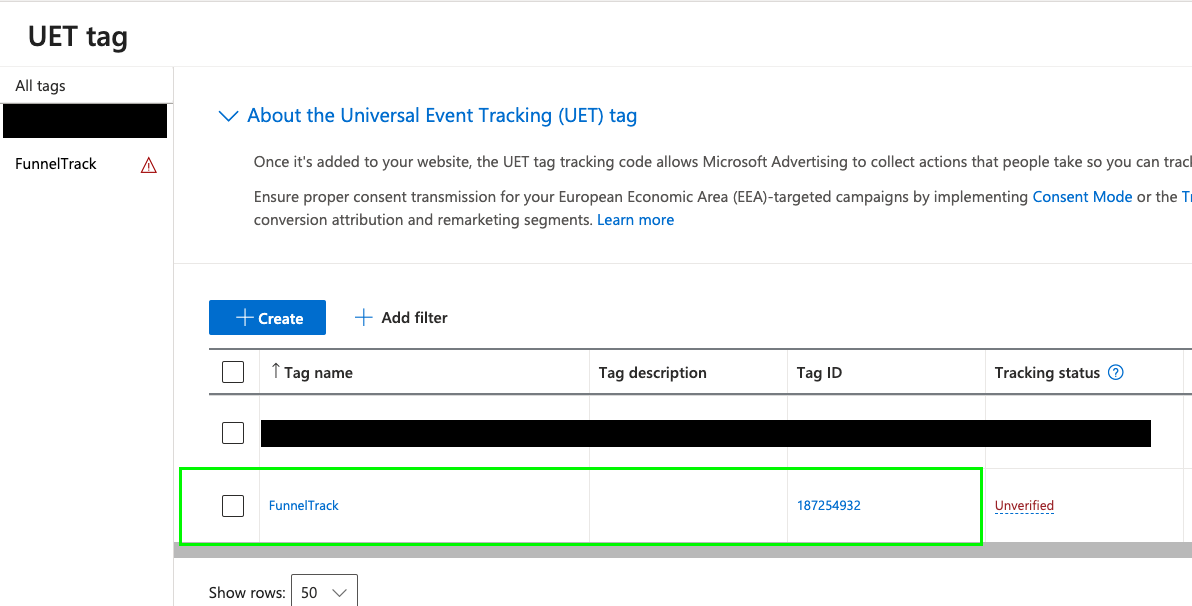
Copy your UET Tag ID
Back on the All tags page, find your newly-created UET tag in the list. The Tag ID column shows your UET Tag ID (a number like 187254932). Copy it and paste it into the UET Tag ID field in FunnelTrack.
Click Connect in FunnelTrack
With UET Tag ID and Auth Token filled in, click Connect. Your Microsoft Ads Conversions API destination is now wired up — next we'll deploy the base UET tag and create your conversions.
Setting up conversion tracking
Deploy the UET base tag, create enhanced conversions in Microsoft, then map each event in FunnelTrack.
Deploy the FunnelTrack pixel
Make sure the FunnelTrack pixel is deployed on every page of your website and any landing pages. You'll find the script and a verification status in the Pixel section of your FunnelTrack account.
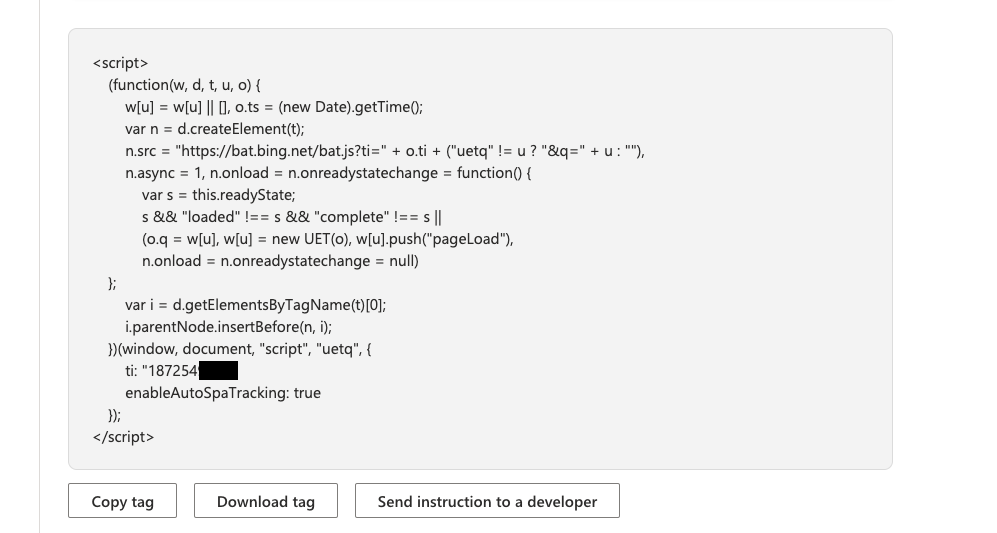
Deploy your UET base tag
Microsoft also needs its own client-side base UET tag on every page of your funnel to capture browser-side activity that pairs with the server-side conversions FunnelTrack sends. Grab the snippet from your UET tag's details page and paste it into the <head> of every page (or via your tag manager).
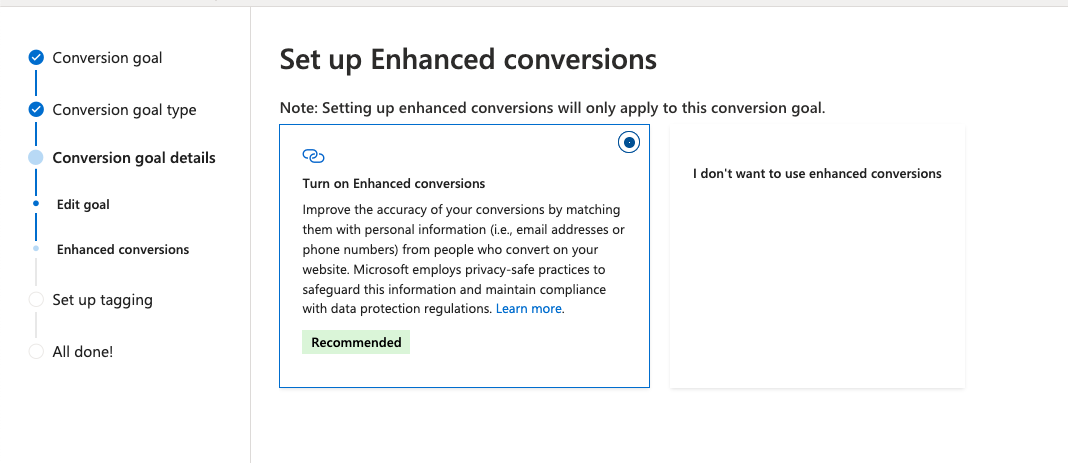
Create your conversions with Enhanced conversions on
In Microsoft Advertising, create a conversion goal for each event you want to count. On the Set up Enhanced conversions step, choose Turn on Enhanced conversions — Microsoft uses hashed user data to improve match rates.
window.uetq.push('set', …) snippet) to install on your site. Skip this— FunnelTrack sends the hashed user data via CAPI server-side, so the client-side script isn't needed and would double-up the identity signal.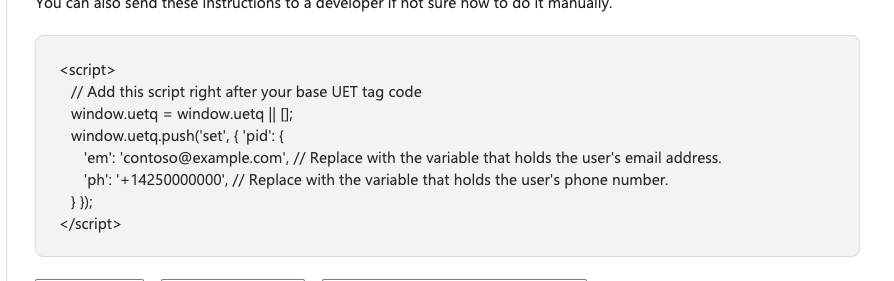
Note the Action / Category / Label parameters
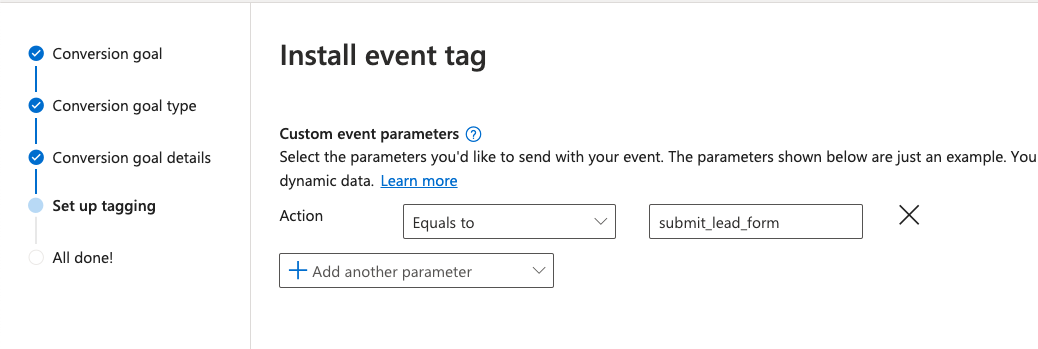
Microsoft's conversion-goal wizard ends with an Install event tag step that defines Custom event parameters — typically an Action with an "Equals to" value (e.g. submit_lead_form). Note these values exactly — you'll paste them into FunnelTrack's event card so the dispatched events match what Microsoft is listening for.
Enable an event template (or create a custom one) in FunnelTrack
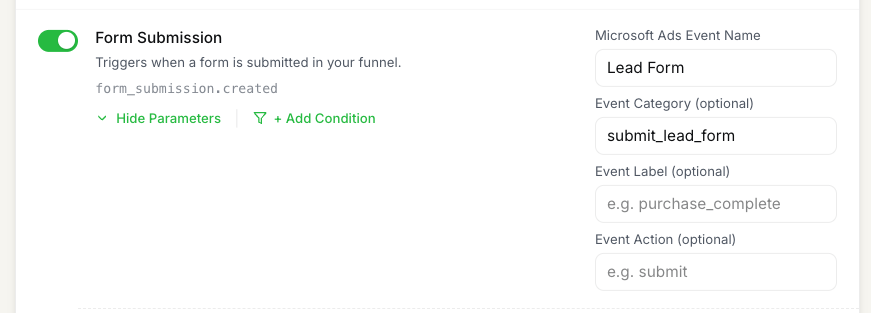
In FunnelTrack, open the source you want to route to Microsoft Ads (e.g., ClickFunnels → Microsoft Ads). Toggle on a recommended event template, or click + Add More Events to create a custom one. For each enabled event, paste the Microsoft Ads Event Name from your conversion goal, plus any matching Event Category, Event Action, or Event Label values defined in step 4.
(Optional) Add custom event parameters, user parameters & firing conditions
Attach custom event parameters, user parameters, or gate events behind specific conditions (e.g., only fire purchase when the order value is over $100). Click + Add Custom Parameters or + Add Condition on the event card.
Save your changes
Click Save Configuration at the top of the routing page. Your event map is now live — every matching source event will be sent to Microsoft Ads from this moment on.
Test & verify
Trigger the action on your website (submit the form, complete the checkout, etc.). Then open Event Delivery Log in FunnelTrack. You should see two rows for each event: an IN row showing FunnelTrack received the source event, and an OUT row showing the dispatch to Microsoft marked delivered.
delivered status in the FunnelTrack log confirms the handoff succeeded.Need a hand?
If anything in this guide didn't match what you're seeing in Microsoft Advertising or FunnelTrack, open a support ticket in your dashboard and we'll get you sorted.